Posts

Painting Is Hard: Progress Since My Last Post

Image
 It's been over a month since I posted on here, and it's been several weeks since I last painted anything. I managed to get out a brush today and throw down a bit of silver today on some models, and that's about all I've managed. Depression is shit, yall. I don't wanna let this bloggo die though so here are some pics of everything I've done since Neave.   First up we have some not quite finished Aetherwings, as promised in the Neave post. These guys were a bit of a pain. I initially started doing a pink colour scheme with them, with the feathers getting darker and more vibrant the further out they got, but it kinda looked terrible. I recalibrated, and went for a standard brown, getting lighter type scheme, like an eagle. This is the same sort of scheme I did on the Aetherwing who sits on the arm of Sanson Farstrider. But I wanted them to look a little fantasy, so as a spur of the moment kind of thing, I painted the outermost feathers red for a bit of visual inte

Neave Blacktalon & Faces

Image
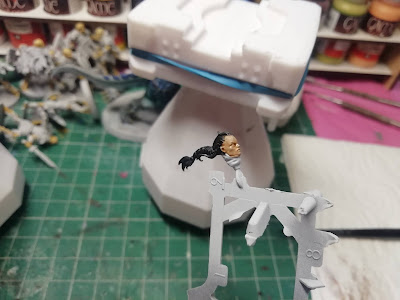
 No updates for a while sadly because depression & fatigue has been kicking my ass and I haven't had the energy to paint much for a couple of weeks. But I've got one little model finally done to show off. Each new Stormcast model that I'm painting, I'm trying to add or develop a technique or skill that I would like to be better at. This way I can get through some of the more formulaic parts of the model painting that I have down to a level I'm happy with and still do something that's challenging and new. For Neave Blacktalon I decided to try to focus on the face a bit more than normal. The first thing that was new is painting the head separately. I've seen people do this a lot before, but this is the first time I've ever done this myself. It was definitely a good thing in this case, not only did it let me prime the head white while I primed the rest of the model grey, but Neave has a long fancy hairstyle that would be difficult to paint around the ba

Homemade Everblaze Comet

Image
 Simultaneously with Lenny, I decided to try my hand at making a homemade version of the Stormcast Eternals endless spell the Everblaze Comet. Going in I was only really trying to make a decent enough version to try it out a bit and have a bit of an experiment with terrain-adjacent skills. The concept was very straightforward, I wanted to make a crater with a flaming meteor in it.   I started out by moulding the crater shape. The base size for this model is a 65mm circle, so I 3D printed a suitable circle. It's unfortunately a bit small for a nice big crater with lots of detail, so I kept it simple. The guide I followed to make the crater was from Wargames Illustrated. Essentially, you make a ring of card, stick it in place and then build the edges of the crater up with air drying clay. I think I might have made it just a little bit too deep here, but you live and learn.    While that dried, I also prepared the comet itself. This was also 3d printed, from a file I found on Thingive

Repainting a Cartoon Lenny

Image
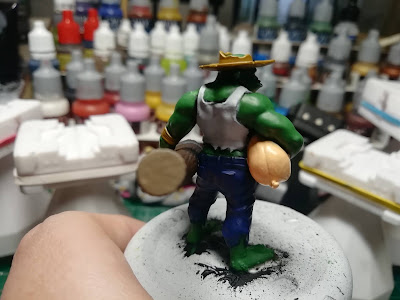
I kept to my bargain! I said Lenny would be next and here he is. This is the same model that I posted previously in my Painting Timeline post. He was the first model I ever painted when I was getting into minis as an adult, and I've had him stripped and waiting for a new coat of paint for quite a while. I figured I'm a bit bored of painting Stormcast gold armour so I'll take a quick break and try a new style. The idea here was initially that I wanted to do something sort of cel-shaded, but I ended up moving more towards just a sort of illustration/comic type style instead. Total experiment, and starting out I had no idea whatsoever how well it would turn out. Not many pictures here because taking lots of in-process pics kinda killed my enthusiasm for the Evocators when I was doing them, so just two sort of checkpoints before the finished product.     This is how I started off, simple highly saturated base coats for all the colours. There was just one trouble. I hated the g

Evocators on Dracolines Step by Step Part 2

Image
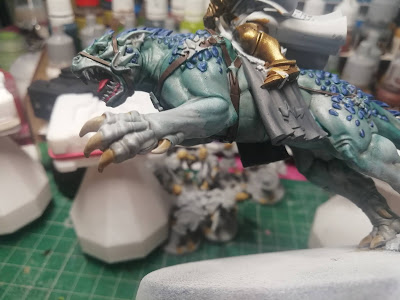
 Howdy! Been a while. I just finished up my Evocators, so here's part two of the step by step process. When last we left off, the beastie himself was almost finished.   The claws on this sort of model are always fun to paint because they're super simple and in my opinion look really good. I base coat with Rakarth Flesh and wash with Soft Tone, then a little highlight of Pallid Wych Flesh. Very pleased with how it came out.       Also did the teeth, tongue, and eyes. Can't say the gums are my cleanest work, but it really helps the model to look more alive and finished. Plus I like doing eyes on bigger monsters because they don't take as much precision and I don't like leaving the eyes unfinished. During this time I also painted the straps brown with my go to dark brown which I use for basically everything that needs to be brown (vallejo charred brown). The teeth of the beastie are grey, and since I put a bit too much grey on my palette, I figured I'd do this grey

Evocators on Dracolines Step By Step (part 1)

Image
I've mostly been painting Stormcast Eternals recently, and I was excited to add these fine folks to my army. I like the models and I like the rules, and I figured I would do a step by step post showing my progress. I wanted to have a bit more to show before posting but I've not been too well and haven't got any painting done in the past couple of days so I decided to just throw up what I have lest this blog die on the vine.  There are two of these and I am painting them side by side but the process is the same so I am only photographing one as I go. Here we start with a Corax White undercoat. I normally prime my Stormcasts with a mid-grey primer but the dracoline has a lot of light tones so it's easier to work over the off-white base.  It will also be helpful when I get to the face which on this model is exposed flesh. The first thing to do is the metal armour on the man himself. I always start with this step as priming light means you really do need to get into all th

Painting Timeline

Image
 Despite being into minis games for somewhere around 6 or 7 years, I only properly started enjoying painting within the last 18 months. So as you can imagine, I started putting in a lot more effort and my results became considerably better. So the blog has some more content on its first day, here is a little timeline of some of my painting to give you an idea of how I've improved over time. Below is a selection of models that I would consider to be representative of my best painting at any particular time.     Starting off above, we have Lenny from Malifaux on the left. He was essentially the first model I ever painted. Technically as a kid I painted some models, we used to get the Lord of the Rings magazine, and I had some 40k models too but I never really painted properly. Looking back, I don't think I did too terrible of a job considering what I was working with. At this point I painted with -- and I am not making this up -- unthinned acrylics for traditional canvas paintin