Evocators on Dracolines Step by Step Part 2
Howdy! Been a while. I just finished up my Evocators, so here's part two of the step by step process.
When last we left off, the beastie himself was almost finished.

The claws on this sort of model are always fun to paint because they're super simple and in my opinion look really good. I base coat with Rakarth Flesh and wash with Soft Tone, then a little highlight of Pallid Wych Flesh. Very pleased with how it came out.
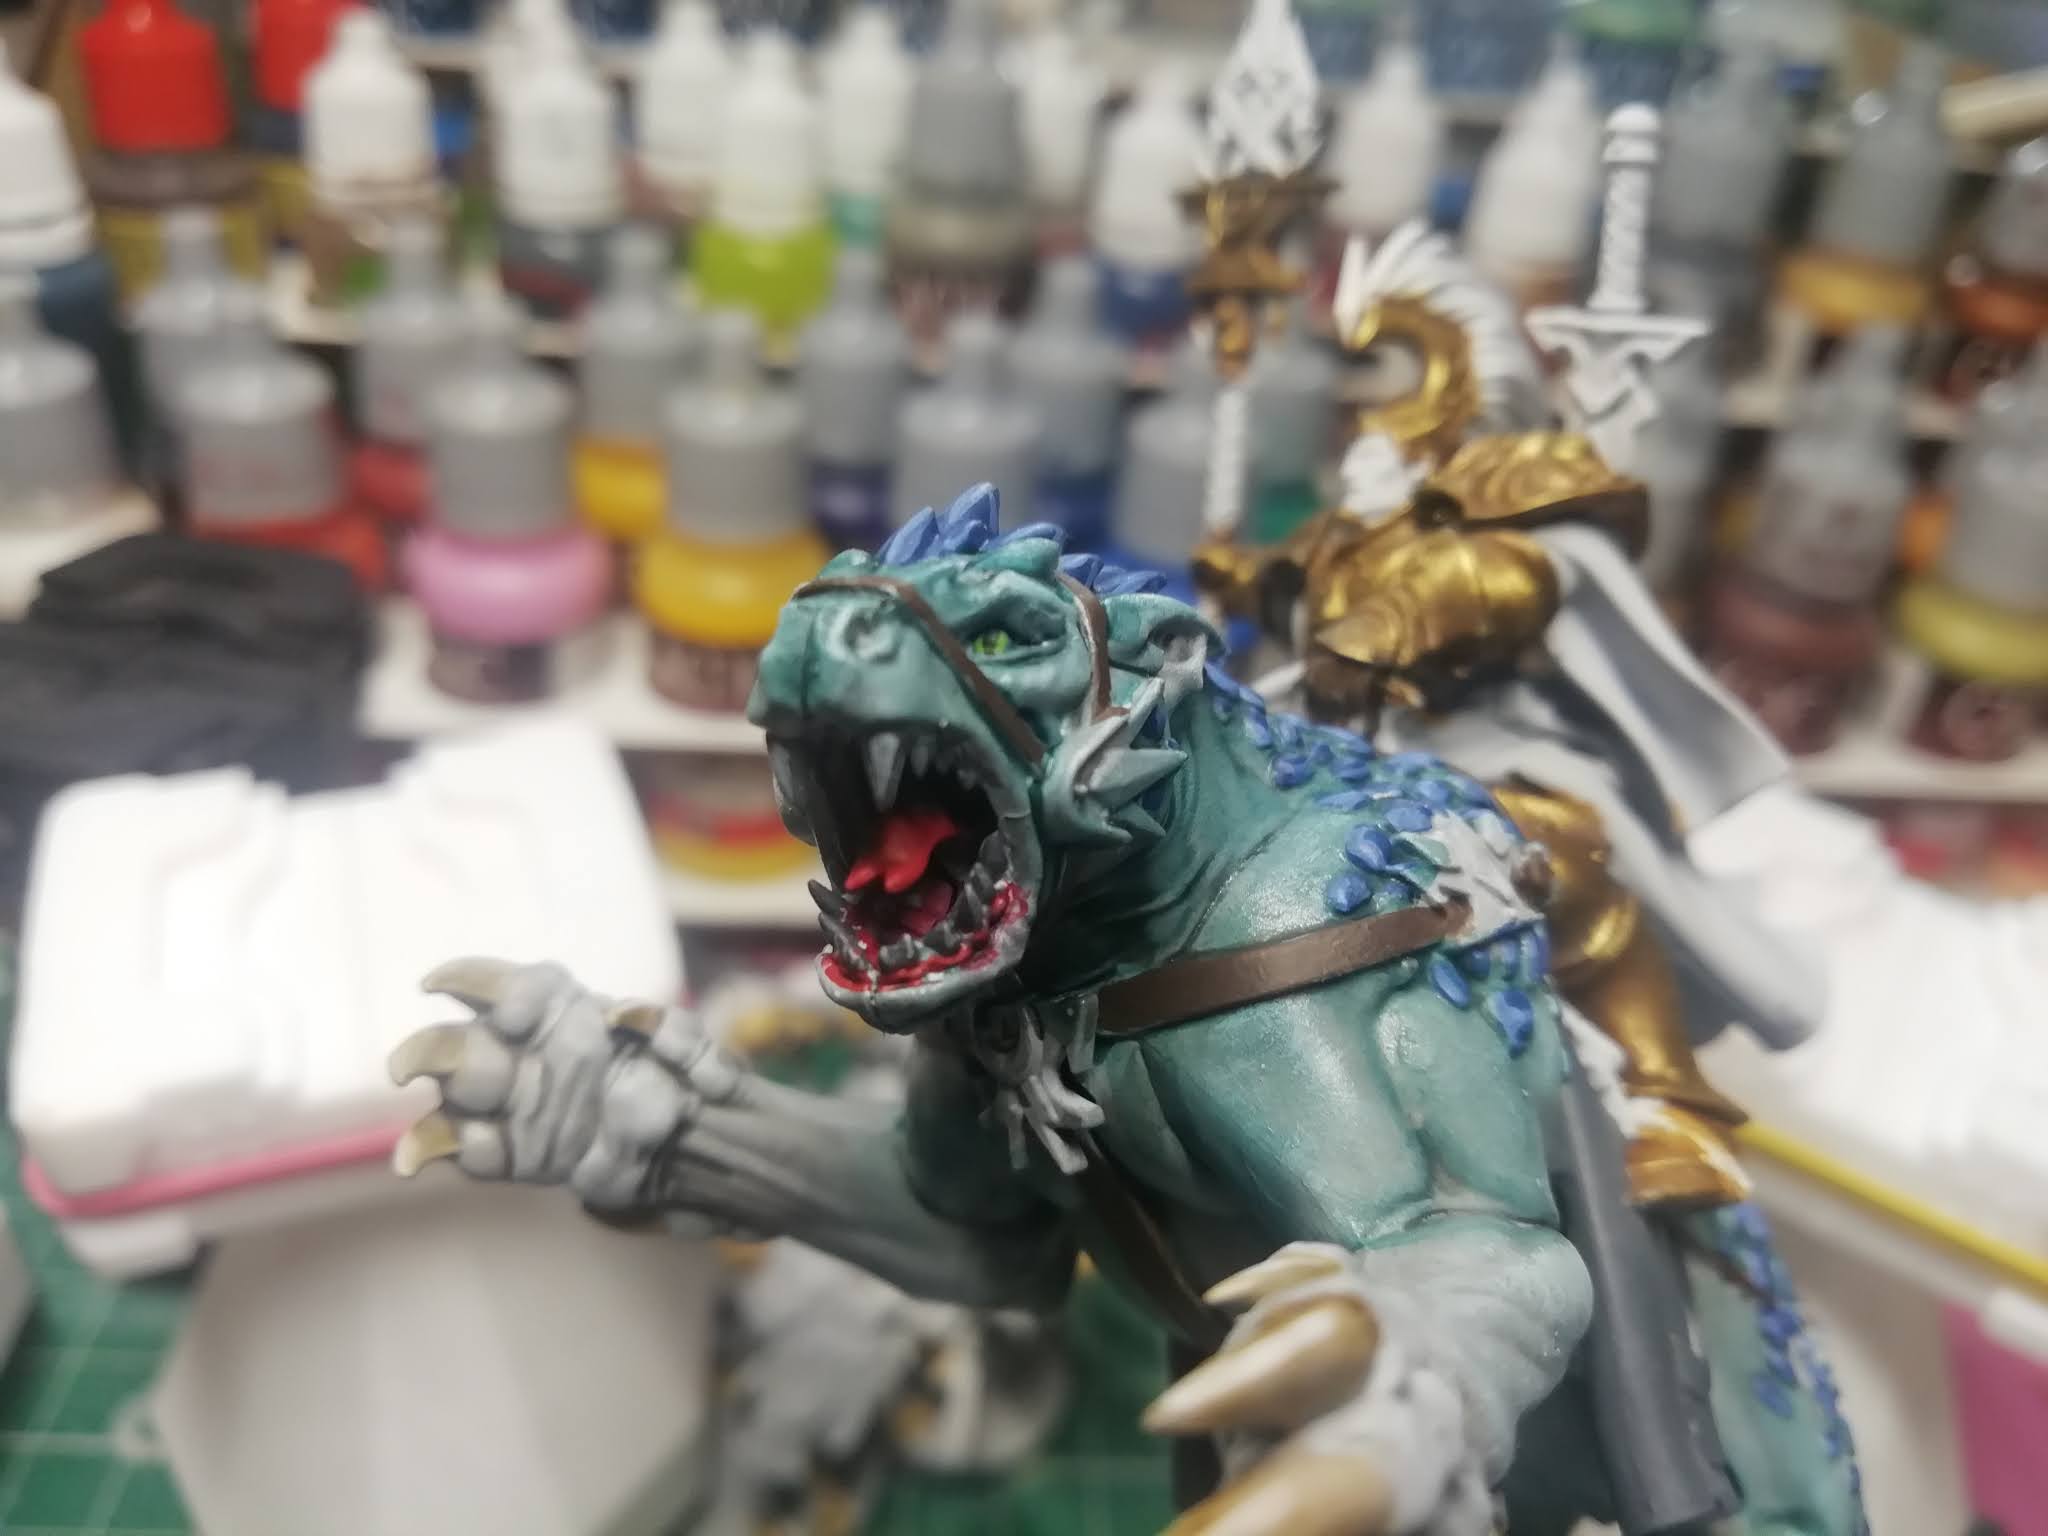
Also did the teeth, tongue, and eyes. Can't say the gums are my cleanest work, but it really helps the model to look more alive and finished. Plus I like doing eyes on bigger monsters because they don't take as much precision and I don't like leaving the eyes unfinished. During this time I also painted the straps brown with my go to dark brown which I use for basically everything that needs to be brown (vallejo charred brown).

The teeth of the beastie are grey, and since I put a bit too much grey on my palette, I figured I'd do this grey cloth bit next.

Usually with grey like this I'd wash with nuln oil and then edge highlight, but part of painting these models is that I am trying to practise manually shading things, so I mixed a darker grey for the shadows and a lighter one for the highlights. It's not my best example of this but I think it looks pretty good.


Followed the grey up with the other large unpainted area remaining, the green cloak, plume, and shoulder pad. Again, manually shaded with mixed dark colours. I'm slowly getting better and faster at this. For the plume, I still wash/drybrush because the texture holds the wash in the recesses much better. No sense spending ages to achieve the same thing. I'm not sure how well the camera shows the difference between the shaded and unshaded photos but there is quite a difference in real life.

For more elite wizardly models like this, I like to give the sleevey things a blue colour to distinguish them from the usual chaff who have grey as their secondary colour. It's the same shade as the Dracoline's scales, so it helps tie the model together a bit more too. These were a real pain to paint because of the awkward angle.

I'd usually do the scabbard in my standard charred brown but there was already quite a bit on this model, and it had a charred brown strap attaching it. I've done that before with an edge highlight to distinguish the two but I had decided at this point that I didn't want to spend that much longer on these models, so I went for a lighter orangey-er brown, which used to be my old go-to brown colour for straps and such.

I went over the metallic stuff with a silver base coat, as well as tidying up the few remaining white areas just to make sure they didn't have any spillage on them because they were just going to be washed to add colour.
Then it was just a case of filling in all the remaining little details.

The face is okay. I'm still not great at faces - but I am planning on focusing a little on it soon. This guy just had a simple white face, washed over with a flesh tone shade. I like how it gives a bit more depth than if I started with a flesh tone, sort of like how GW Contrast paints work. I should probably leave the eyes but I can't help but fill them in and I suppose I won't get better if I don't practise.

All of the silver metals were given a nuln oil wash, followed by a drybrush with two increasingly bright shades. It always blows my mind how much of a difference that drybrush makes, every time I think 'am I going to bother doing it this time?' and when I do I'm always grateful because of the extra depth it adds.

I did the flasks with a really simple white base coat and then covered with a diluted blue ink. It feels like I need to practise this a bit more or change up the method because sometimes it looks really good, sometimes it looks a bit flat. I used to also do it for the gems but started doing a more consistent base coat with a couple of highlights instead. I've been tempted to try out the GW technical gemstone paints but I'd like to learn a more traditional way just so I have any colour I like in my pockets.

This is a kind of miscellaneous catch-all shot at the end. Did some brass metal on the sword and scabbard because it adds a little variety and I like the tone. The parchment is the standard GW method, minus highlighting because I decided not to do that much edge highlighting on these guys.

And the finished (for now) products.
I finished them a bit earlier than I would like to have. I'm very happy with the beasties in general, but the riders could definitely use a bit more work. When I base them, I may come back and add some extra highlighting to pick out the edges of the straps and parchment and so on, as well as picking out some of the sculpted details on the armour in silver. I didn't do it here because I found myself struggling to get motivated to paint again recently, and having models that are very nearly done but not quite done is the worst possible state for me to be in when it comes to getting motivated, it's just wrapping up little details where you don't get to see tons of great progress but it's very essential.
The other reason is that I found I made things a lot harder for myself here. Documenting each step for this post was a little extra work and I don't think I'll go into this much detail again, but the main thing is that I think these models would have just benefitted from being painted in sub-assemblies. I don't remember exactly how they fit together so it may be (and I strongly suspect) that you can't straight up paint the rider separately, but the main source of irritation was the swords on their backs, which are a separate piece. If I were to start over, I would definitely leave the swords off to paint them separately, or possibly leave them off entirely because I don't hugely like how they look.
I'm going to take a break from Stormcasts despite still being on the Age of Sigmar Hype Train. I've been wanting to try painting a cel-shaded look next. It's going to be a real experiment and may end up looking totally awful but we'll see. I'm going to repaint Lenny, who you saw in the painting timeline because he doesn't need to fit any particular scheme and he's a good fairly cartoony model.


Comments
Post a Comment