Evocators on Dracolines Step By Step (part 1)
I've mostly been painting Stormcast Eternals recently, and I was excited to add these fine folks to my army. I like the models and I like the rules, and I figured I would do a step by step post showing my progress. I wanted to have a bit more to show before posting but I've not been too well and haven't got any painting done in the past couple of days so I decided to just throw up what I have lest this blog die on the vine.
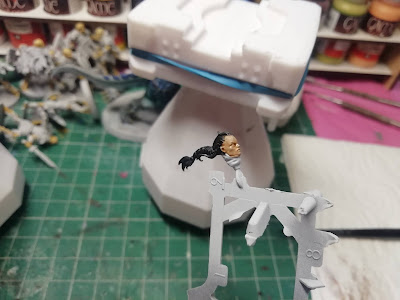
There are two of these and I am painting them side by side but the process is the same so I am only photographing one as I go. Here we start with a Corax White undercoat. I normally prime my Stormcasts with a mid-grey primer but the dracoline has a lot of light tones so it's easier to work over the off-white base. It will also be helpful when I get to the face which on this model is exposed flesh.
The first thing to do is the metal armour on the man himself. I always start with this step as priming light means you really do need to get into all the crevices with this colour, and a little overspill is possible. This way I can simply cover it up later. Also I just don't particularly enjoy this part so it gets it out of the way. I start with a dark brown metallic colour and follow with a wash of black and orange-brown ink.
It dulls the shine a little bit and shades the recessed areas, plus just gives a bit of variation in texture. I go quite heavy with this wash.
It's then time for an all-over drybrush with a bright gold. I use this mangled old brush for it because it gives an interesting texture, a sort of cast brass look which I really like. This is the other reason that I do the armour first - it's not unusual to get little flecks of gold on other parts of the model, and I can just cover it up. I'm not going to claim this method for metal is amazing but I do like how it looks and it's a bit more of a rough look than the official stormcast models.
That's it for the rider for the moment, as I turn my attention to the beastie. The method I use for the skin is the method suggested in the Mortal Realms magazine, and I really like it.
It starts with a simple all over light grey. This is then shaded with Nuln Oil, which is Citadel's black wash and honestly might as well be magic. Top tip for any novice painter is just get a pot of nuln oil (and a bottle of army painter soft tone) and it will change your life.
Then build up the layers with a drybrush of the same light grey, followed by corax white (off-white grey). It might be a little hard to see in the photo but the difference between the plain grey skin and the shaded + drybrushed skin is night and day. It's really subtle but it picks out all the recesses and raised areas.
That is followed by using a wash, in this case a green-blue to tint the upper portion of the body. I used a couple of layers towards the top, and tried to blend the edges by spreading them out with a wet brush. Having painted a couple of models in this way already, this is the part where I usually feel like I've made a huge mistake and it looks a bit crap. I especially felt this when doing my Astreia Solbright, where I used red ink instead of the green-blue. However, the next few steps really improve the look and as long as I power through I'm happy.


Comments
Post a Comment